The ability to capture a long exposure image on the iPhone was first introduced in iOS 11 back in September 2017. There was little fanfare with its introduction and it is not widely discussed or documented; however, it can be used to take some exceptional and creative photos.

Unless shooting in very low light, DSLR and Mirrorless cameras usually require the use of additional filters on the lens to capture long exposure photos. I have a number of Neutral Density (ND) filters for my Fujifilm mirrorless camera. These filters reduce the amount of light entering the camera, thereby increasing the time needed (shutter speed) to capture the photo. You are intentionally darkening the image to trick the camera into using a significantly longer shutter speed. Whilst you can buy third-party lens and filters for an iPhone, they are cumbersome and fiddly for everyday shooting and remove the major benefit of portability for iPhone photography. Being able to convert an image in Apple Photos to a long exposure after the photo is taken is a quick and simple way of introducing the long exposure style into your photography.
The Subject is Important
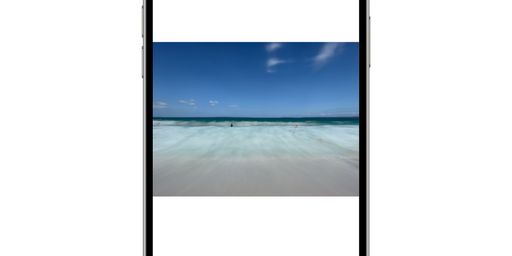
Not all photos can be captured and converted to long exposure. They usually require a combination of movement (the area to be blurred) and stationary subjects that remain sharp and in focus. As in the image above, photos containing moving water are a classic subject for long exposure, with the effect of making the water smooth and somewhat ethereal, with the surrounding area, such as a beach, land or buildings remaining in sharp focus. However, you can use any subjects that combine movement with stationary objects, such as with the moving traffic in the photo below.

Long Exposure with an iPhone
To be able to capture a long exposure photo on the iPhone we will be using Live Photo, first introduced with the iPhone 6S in iOS 10 and further enhanced in iOS 11 to support converting them to long exposure photos.
Stabilising the iPhone
It is important to keep the camera still when taking a Live Photo (as it is essentially capturing a short video), and it is recommended that you support the iPhone using a tripod if you can. Alternatively, holding the iPhone very still or bracing yourself against a wall or solid surface can also help reduce any movement.
Enabling Live Photo
#1 Position the camera
Once you have decided on the subject to take, position the camera to minimise any movement. You can optionally mount the iPhone on a tripod to reduce most, if not all movement.
#2 Enable Live Photo
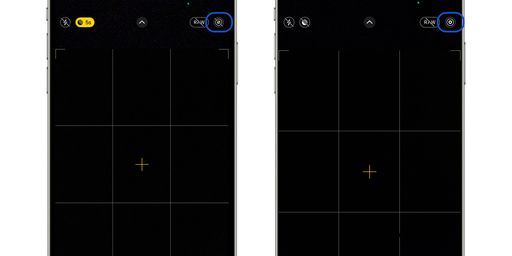
Open the Camera app and if not already enabled, turn on Live Photo. Live Photo is represented by the icon in the top right corner featuring a number of circles. If a line is through the icon, then it is disabled.
Using the Self Timer to Reduce Camera Shake
#1 Open Photo options
You can optionally use the self-timer to introduce a delay before the photo is taken, reducing the chance that the camera moves when it is mounted on a tripod or being held very still. To access the self-timer, you first open up the photo options.

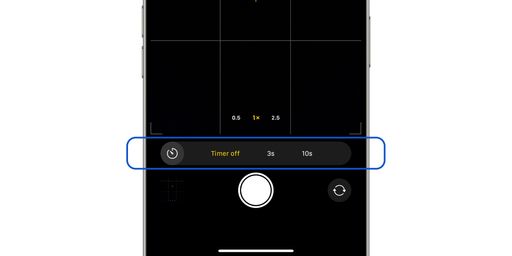
The photo options are shown below the photo.
#2 Open self timer options
To the far right is the self-timer options.

Clicking on the self-timer icon will show the available options, the default Off or a 3 or 10-second timer.
#3 Select self timer duration
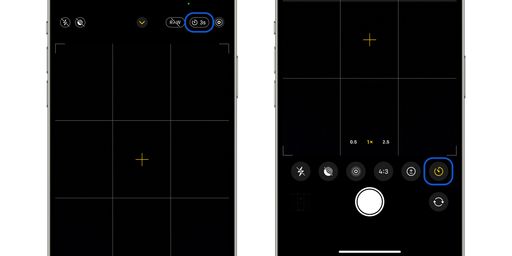
After choosing either a 3 or 10-second timer, the screen changes to indicate the self-timer is being used.
Taking the Live Photo
#1 Take the photo
Tap the shutter button to take the photo.
#2 Wait for self timer
If using the self-timer a countdown will appear on the screen before the photo is taken and the camera flash will illuminate for each second of the countdown.
Converting to Long Exposure
Once taken, the Live Photo will need to be converted to a long exposure photo. This is achieved in the Photos app.
#1 Open the Photos app
Open the Photos app and find the photo taken. You can also view all Live Photos taken by opening the Album tab and clicking on the Live Photos Media Type.

#2 Open the photo effects
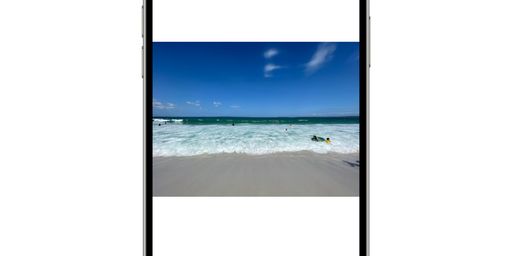
Here I have selected a photo of some crashing waves at Greenfield Beach, south of Sydney, Australia. Note the LIVE icon at the top of the photo to indicate it is a Live Photo.
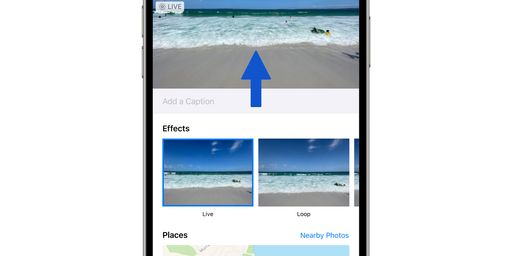
Swipe up on the photo to reveal the Live Photo Effects.
#3 Select the Long Exposure effect
Scroll to the right to select the Long Exposure effect.
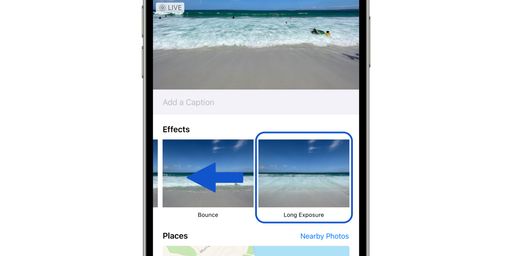
Selecting this effect will convert the image to a long exposure image. It might take a second or 2 to convert the image. Note the icon at the top of the image now displayed LONG EXPOSURE, replacing the word LIVE. The Live Photo icon is still displayed.
You can edit a Live Photo as you would a video, allowing you to crop the video. You can also edit the photo by applying a filter or making adjustments.
There are limitations, however. There is a limit of 3 seconds to a Live Photo, so it is not really ideal in all situations, as the movement within the photo will need to be fast enough to achieve a blurred image in only 3 seconds. If you need to take images longer than 3 seconds, you can achieve better results using a slow shutter app such as Slow Shutter Cam.
Example Photos
I have included a couple of before and after shots that I have taken to show what type of effect is possible.
Example 1
This photo was taken with my iPhone 12 Pro Max at Berrara on the NSW South Coast in Australia. I cropped the photo to square and used the adjustments in the Photos app to convert it to Black and White, before converting to long exposure. I really enjoy the smoothness of the water in this photo, giving it a more smooth and peaceful look, bring your attention more to the texture of the rocks.


Example 2
This photo was also taken with my iPhone 12 Pro Max at Vincentia on the NSW South Coast in Australia. The photo has had no edits and was simply converted to long exposure. I left this photo as-is, as I love the green colours on the rocks. The smoothness of the water brings your attention more to the rocks rather than draw your focus to the crashing waves.

