
Introduction
Whilst you can create all of your reminders in the default Reminders list, using multiple lists allow you to group reminders together. Reminder lists can be further grouped together using Groups.
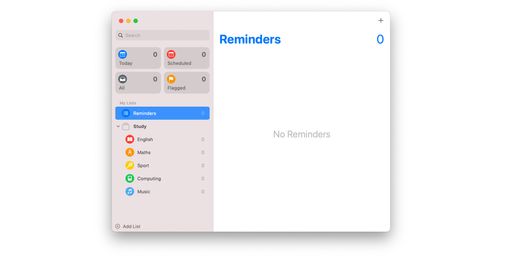
For example, you can have a group for the different subjects you are studying at school or university where each reminder list represents the subjects being studied.
Or you may have a group for shopping where each reminder list represents an individual shop or a type of shop.
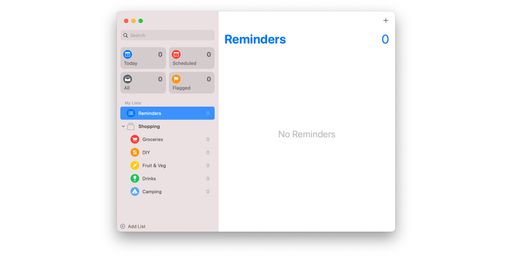
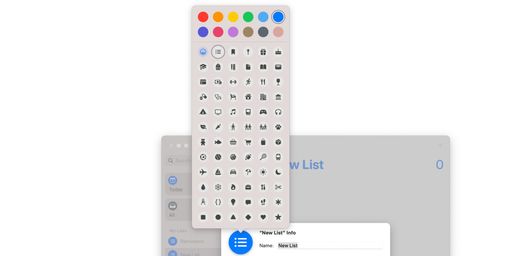
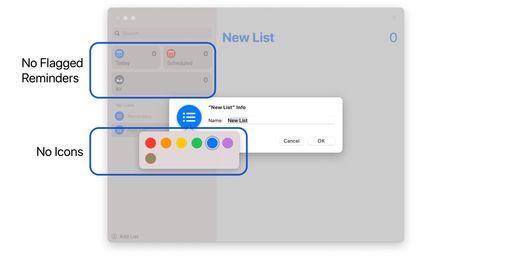
As shown in the above screenshots, you can use colour and different icons to identify lists easier. Apple Reminders allows you to choose from 12 colours and from 72 icons.
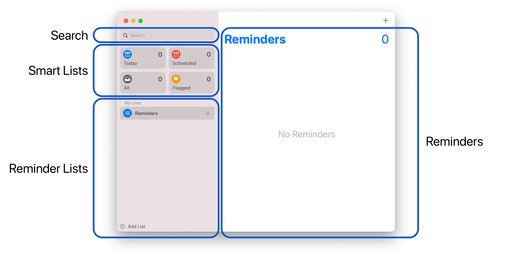
The Reminders app can be split into 4 main areas, Search, Smart Lists, Reminder Lists & Groups, and Reminders.
Refer to How to Create Reminder Groups in Apple Reminders on the Mac article for the steps to create groups.
Creating a Reminder List
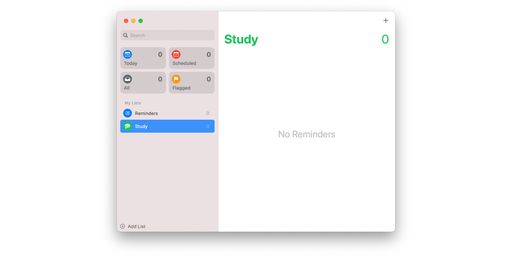
In this example we will create a new Study reminder list.
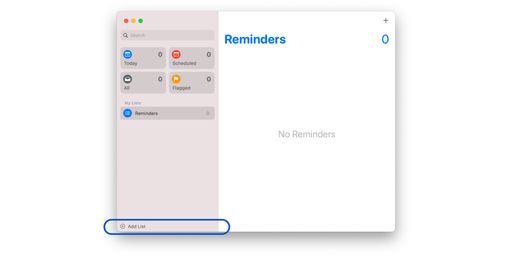
#1 Create new list
Select Add List at the bottom of the reminder list view. Alternatively you can either select File -> New List or use the ⇧-⌘-N keyboard shortcut.
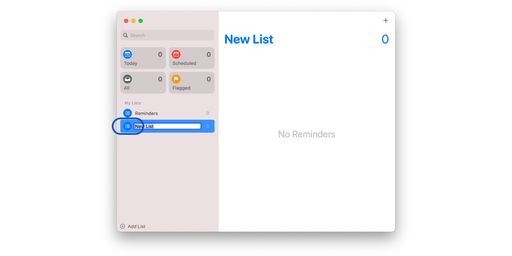
#2 Name the reminder list

You can also add emoji to the name. To open the Emoji window, you can either select Edit -> Emoji & Symbols or use the ⌃-⌘-Space keyboard shortcut.
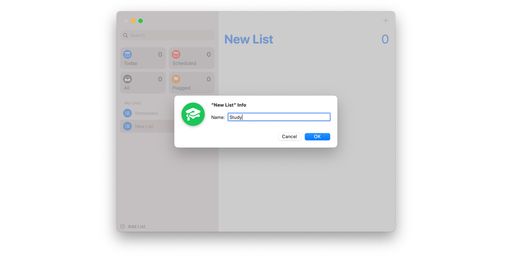
#3 Double click the icon to open the list info window
The reminder list info window is opened. You can also use the ⌘-I keyboard shortcut to open the info window.
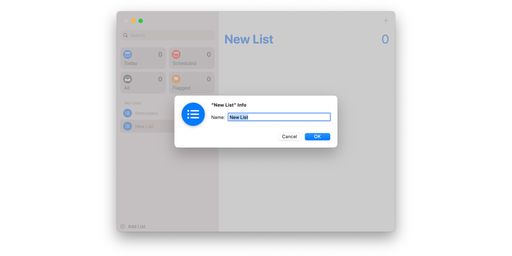
You can also change the reminder list name on this screen if not previously set.
#4 Click on the icon to open the colours and icon options
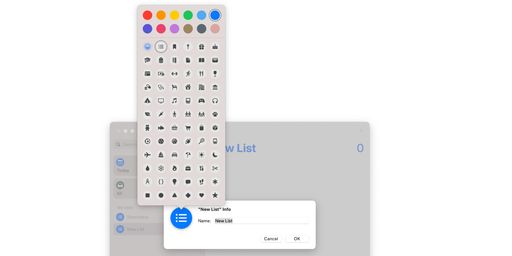
#5 After choosing the required colour and icon, click OK
The reminder list is now created.
Arranging Reminders Within Lists
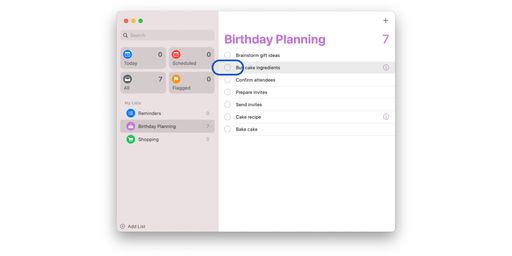
In this example we will move a reminder within the Birthday Planning reminder list.
#1 Open the reminder list
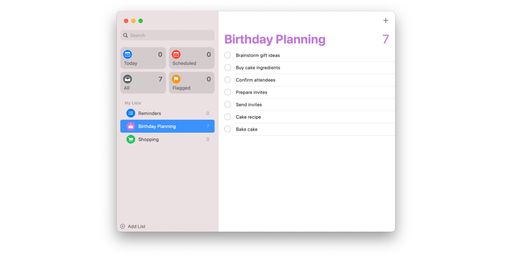
#2 Select the reminder to be moved
It can be a bit tricky to select the reminder. You need to select the reminder to the left of the complete radio button or between the radio button and the title. I have highlighted this area on the screenshot. Be careful not to select the radio button as this will mark the reminder as complete!
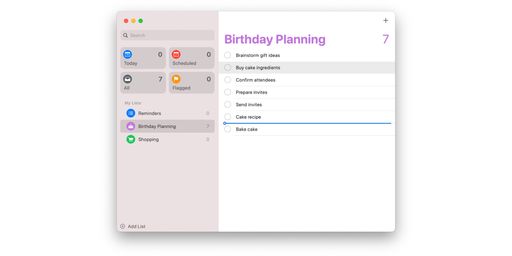
#3 Keep holding the reminder and drag it up and down the list to where you wish to move it
A thick line will show between the reminders to indicate where the reminder will be moved.
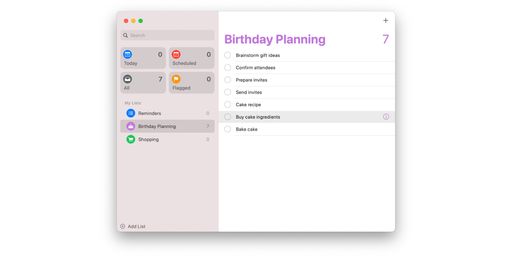
#4 Release the reminder
Moving Reminders Between Lists
In this example we will move a reminder from the Birthday Planning list to the Shopping list.
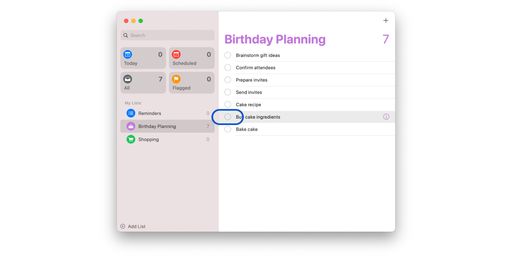
#1 Open the reminder list and select the reminder to be moved
As above, it can be a bit tricky to select the reminder. You need to select the reminder to the left of the complete radio button or between the radio button and the title. I have highlighted this area on the screenshot. Be careful not to select the radio button as this will mark the reminder as complete!
#2 Keep holding the reminder and drag it over to the list to be moved to
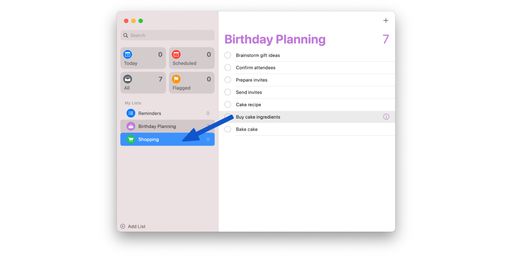
The target list will become highlighted as you hover over it.
#3 Release the reminder
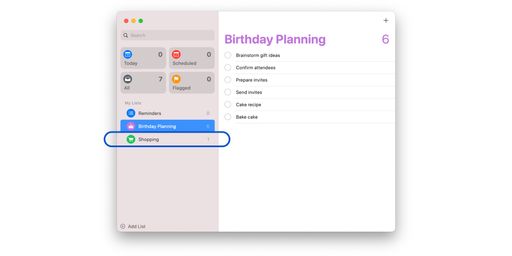
The number beside each list that represent the number of reminders in that list will be updated.