
Introduction
Using groups in Apple Reminders allow you to group 1 or more reminder lists. This helps create a structure for your lists and reminders. How you group lists is a personal choice and depend more on how you intend to use reminders.
You may wish to keep things simple and separate lists and reminders between areas of your life such as Work, Personal, and Family.
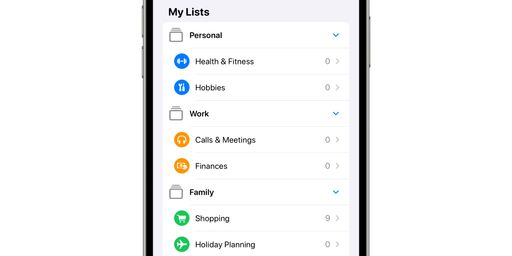
Note that you cannot nest groups and unlike reminder lists, you are not able to change the default group icon or colour.
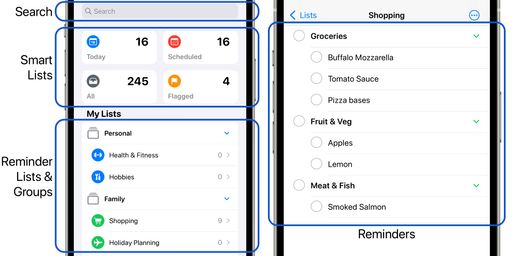
The Reminders app can be split into 4 main areas, Search, Smart Lists, Reminder Lists & Groups, and Reminders. Reminders are displayed when you select a reminder list. On the iPhone, these are split across 2 windows with the reminders being listed when you select a reminder list.
Reminder Groups and iCloud
Reminder groups can only be created when you are logged into iCloud and are synchronising your reminders with iCloud.
Creating a Group
Groups can only be created from existing reminder lists and you cannot create an empty group. However, if you delete all reminder lists from a group it does leave the group empty. You will need at least 2 lists to be able to create a group using this method.
#1 Drag one reminder list over another
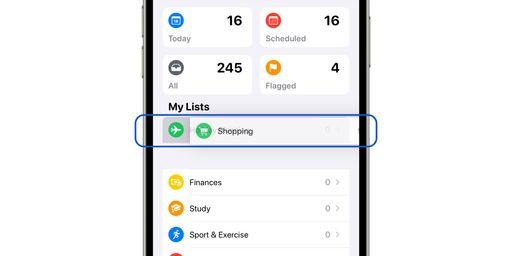
Select and hold the first reminder list and drag it over the top of the second list.
Note that an initial context menu is shown. Simply ignore this and continue to move the list. We will cover this menu in an article covering managing reminder lists.
The second list will be highlighted as you hold the first list over it. Here we drag the Shopping list over the Holiday Planning list.
#2 Release the selected list
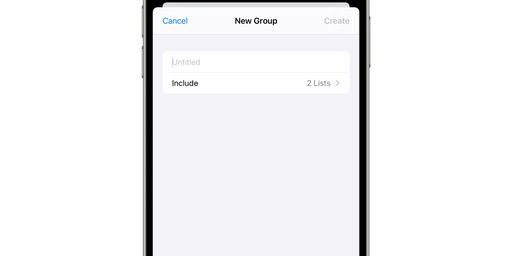
The lists are added to a new group. A new window is opened allowing you to name the group.
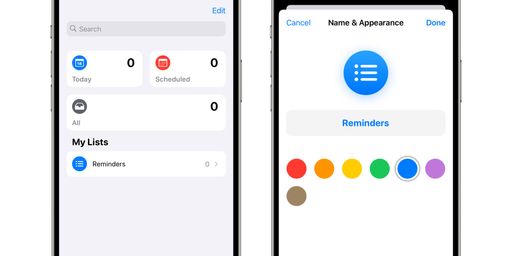
#3 Name the group
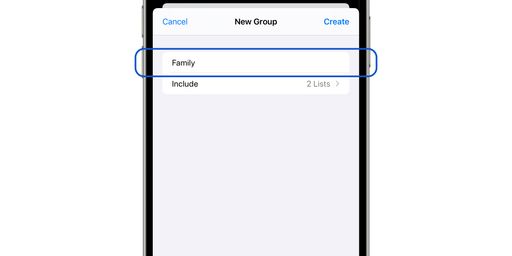
When naming a group, you can also add emoji to the name. To open the Emoji keyboard, click the ☺ below the keyboard to open the Emoji keyboard.
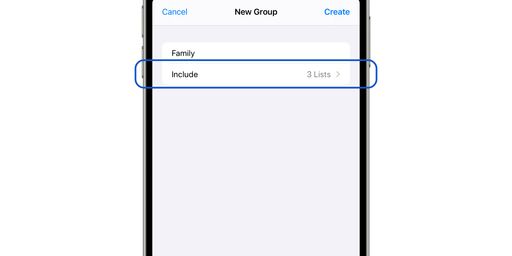
You can continue below to add more lists to the group, or press Create to create the new group.
#4 [Optional] Add more lists to group
You can add more reminder lists to the group. Select the Include row currently showing that 2 lists are being included in the group. Here we add the Finances group to the group.
After selecting any additional groups, select Create to return to the previous screen.
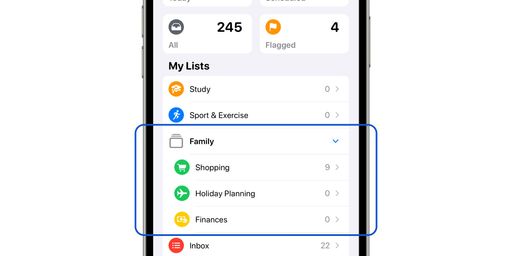
The group is created. Note the new group is created at the bottom of the reminder lists. We show you how to move groups below.
Moving Reminder Lists Between Groups
Reminder lists can also be moved between existing groups. You can also move a reminder list outside of a group.
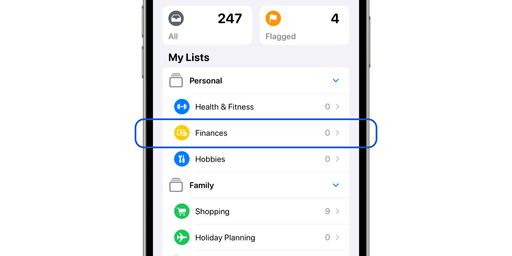
#1 Select the reminder list to be moved
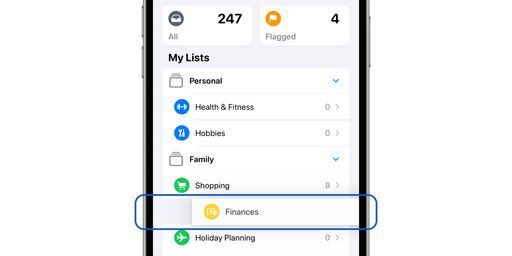
Here we will move the Finances list from the Personal to the Family group.
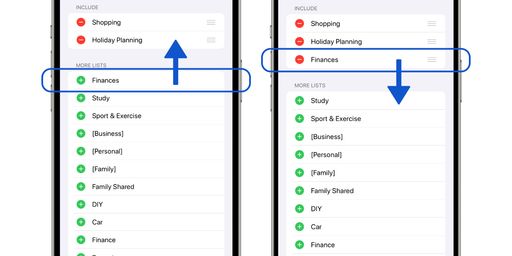
#2 Drag the list to the other group
The Finances list is dragged down into the Family group. Note that an initial context menu is shown. Simply ignore this and continue to move the list. We will cover this menu in an article covering managing reminder lists.
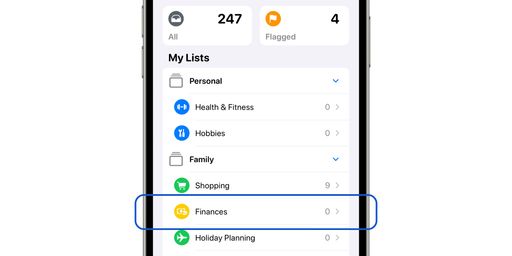
To show where the list will be moved to, a gap appears between lists.
Release your finger to move the list.
Adding and Removing Reminder Lists to Groups
Reminder lists can also be added to and removed from existing groups without having to move them individually. Similar to moving reminder lists between groups, but a faster method if you wish to add (or remove) multiple lists at the same time.
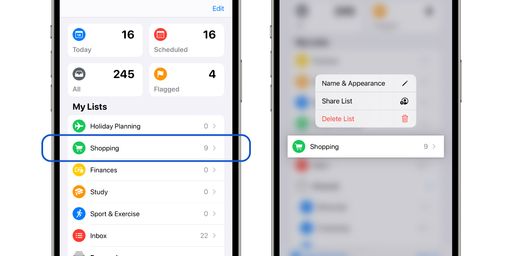
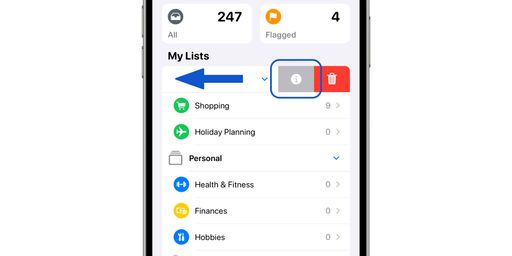
#1 Swipe left on the group and select the info icon
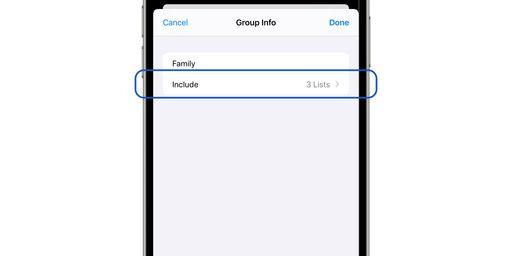
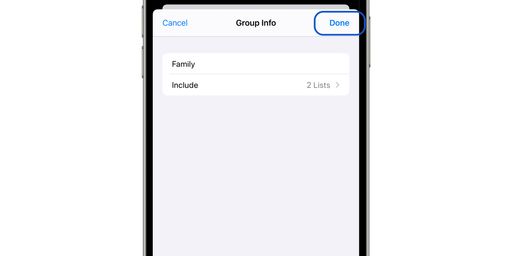
This opens the Group Info window. Select the Include row currently showing that 2 lists are being included in the group. Here we add the Finances group to the group.
Select + next to a reminder list to add the list and - next to a list to remove it. After adding and removing additional lists, select Done to return.
The reminder lists are added or removed to the group. When adding lists they will be removed from any groups they are already in as reminder lists can only be in a single group. If removing a group they are moved outside of all groups.
Moving Groups
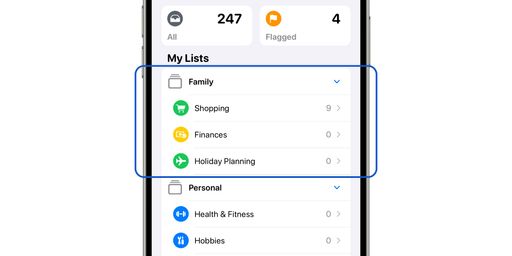
Groups can also be moved to be able to change their display order. If you have a lot of groups and reminder lists you may wish to move the most frequently used ones to the top. You can also close a group by selecting the down arrowhead next to each group. The group is updated with the number of reminder lists in the group. Press the right arrowhead to open the group.
#1 Select the group
When selecting groups, the group will be closed. Continue to hold your finger after selecting the group. Here we are dragging the Family group to the top.
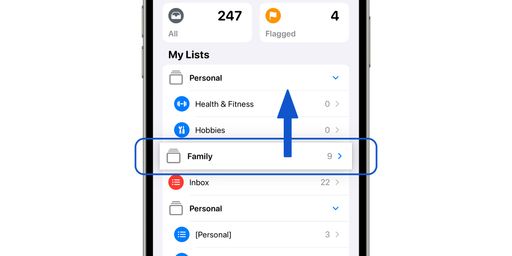
#2 Drag the group to where it should be moved
To show where the group will be moved to, a gap appears between groups. You cannot move a group inside another group.
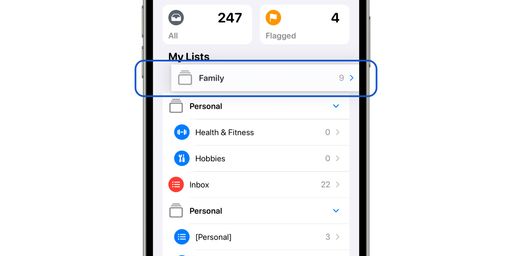
The group is opened back up after it is moved.
Renaming a Group
When renaming a group, you can also add emoji to the name. To open the Emoji keyboard, click the ☺ below the keyboard to open the Emoji keyboard.
#1 Swipe left on the group and select the info icon
This opens the Group Info window.
#2 Rename the group and press Done
If you no longer wish to rename the group, press Cancel to close the window.
Deleting a Group
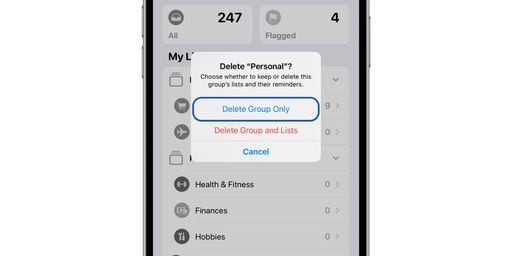
When deleting a group you have the option of also deleting all reminder lists and reminders in the group. Here we will delete the Personal group but not the reminder lists and reminders.
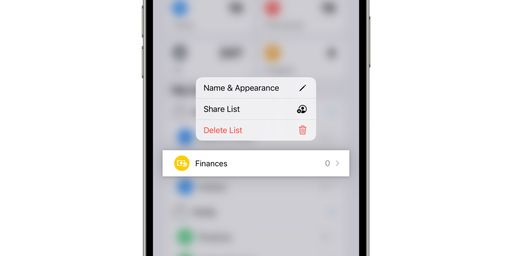
#1 Swipe left on the group and select the trashcan icon

A delete confirmation window is displayed.
#2a Select Delete Group Only to delete the keep and keep the reminder lists
This will only delete the group and leave the reminder lists and reminders.
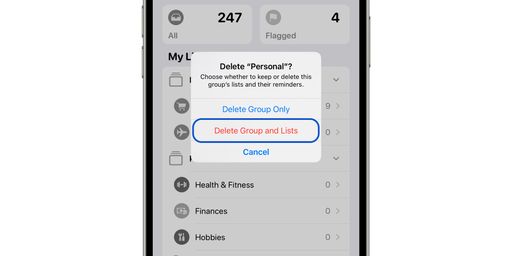
#2b Select Delete Group and Lists to delete both the group and the reminder lists and reminders
This will delete the group as well as all reminder lists and reminders in the group.
#3 The group is deleted
Here we selected Delete Group Only.
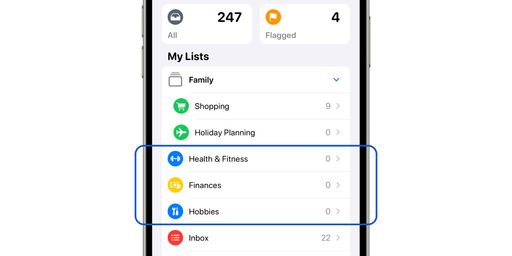
When the group is deleted, the reminder lists are moved to the bottom of the lists, so you may need to move them after.